Increase Google AdSense CTR

An increase in CTR (Click-Through-Rate) can mean a lot to Google AdSense Revenue to your blog. To increase Google AdSense revenue, you have to either increase the traffic or CTR. If somehow, you manage to triple your CTR just by tweaking the Google AdSense code, you can get three times more traffic.

What Google AdSense engineers say in increasing your CTR.?

“Due to the dynamic nature of Google AdSense, fluctuations in your revenue will occur. Your earnings will depend on a number of factors, including the types of ads being served to your pages, the cost per click or cost per impression of these ads, and your users' click through selections. Regarding ad placement - the best ad format varies from page to page. We've observed that, in general, wider ads perform better because of their reader-friendly format. We strongly recommend putting your users first when deciding on ad placement. Think about their behavior on different pages, and what will be most useful and visible to them. You'll find that the most optimal ad position isn't always what you expect on certain pages.”

Google Adsense Optimization Guide
For example, on pages where users are typically focused on reading an article, ads placed directly below the end of the article tends to perform better. It's almost as if the users finish reading and asking themselves, “What can I do next?” Precisely targeted ads are just like answering their questions.

CTR largely depends upon the keywords you are targeting, look of your blog, quality of its content, placement of Google AdSense ads, page optimization, and various other factors. Generally, Google AdSense blocks wrapped between the quality content works the best. For the websites having poor quality content, placing the Ads before the start of the content works well. But you will be getting low priced ads. Besides, nobody will like to add your URL to their favorites. However, if you have quality content that keeps the visitors glued, you may get low CTR, but you will be getting high priced ads and regular visitors.

Google AdSense comes after traffic. No traffic, no Google AdSense. Take good care of your traffic. Your visitors expect some valuable information from you. Make sure you are providing quality content to them. Then it will automatically increase AdSense CTR. https://www.google.com/support/adsense/bin/static.py?page=tips.html

Build an effective AdSense site?

What do you think about your AdSense performance? Do you think you have a formula to success? High traffic? Content? Not really? I am going to tell you more what should be included in this formula.

The trick to putting up an AdSense site that actually makes money is this: You need to have a site that displays ads with the most profitable keywords available and get traffic to your site the cheap way (or even free of charge) as possible.

So how do you know what are the most profitable keywords? You can use the Google AdWords Traffic estimator. The basic functionality is available for anyone to use, even without an AdWords account. Just enter your keywords in the text box at the top. You can leave all the other fields blank for now. Push the Continue button at the bottom of the page and you will see how much each of your keywords costs to get the #1-3 spot in Google AdWords.

How does this help you to find profitable AdSense keywords? First of all, you are splitting the price of the keyword with Google every time someone clicks on your ads The actual percentage is not known, but most experts agree that it is about 50%. If a keyword costs $20 for the number 1 spot and someone clicks an ad on your page that uses that keyword, then you will get somewhere around $10!

You should know that high priced keywords do not mean high levels of traffic. The traffic estimator will also tell you the number of clicks per day that each keyword is getting in the number one spot. What you need are keywords that are a balance between the most money and the most clicks per day.

Another thing you need to know before building an AdSense site is which keywords to use to bring in the most traffic. You don't want to go up against ten million other sites that are all talking about the same thing that you are. What you need is a niche topic, something that people are hungry for information about. Here is a step by step process for finding a niche topic.Download a free keyword tool fromhttp://goodkeywords.com/.

When you get it, enter the most general keyword about your topic that you can find. It will give you a list of related keywords from the Overture search engine along with the number of times each one of those keywords was searched for in the last month.

For every keyword that the Good Keywords gives you, enter the following search into Google: allintitle:yourkeyword. Look at the number of results that Google displays for each keyword.

Divide the number of results by the number of searches and you will come up with what is commonly referred to as the R/S ratio. In economics, this is called Supply/Demand.

Look for keywords that have a high number of search, but a low R/S ratio. I wouldn't choose any keyword unless there were at least 1000 searches per month and an R/S ratio of 2.0 or less.

Take the most profitable keywords in this group and build your AdSense pages around them.

Alright, so you have the most profitable keywords that are in high demand. You now need to have some content related to each keyword in order to get Goggle to put the right kind of ads on your page. You can either write this content yourself, or you can go to one of the many free article websites on the net and grab some free articles related to your keyword. Just make sure to give the author credit for the article, it's not nice to steal.

Once you have your article, start putting your AdSense ads in the middle of the article, about once every few paragraphs or so. I have found that this is the most effective way to get people to click on your ads. You are allowed up the three sets of AdSense ads per page, so place them wisely.

That is really all there is to making a profitable AdSense site. Just find the best keywords, get some articles about them, add your AdSense to them, drive traffic to these pages, and start making money.

Author:Alex Hudson, univeristy in Ireland

How much can I earn with AdSense?

Once you set up and running of Google AdSense ads on your blog, you can view your earnings at any time. Usually all we very conscious about go to this most desired place every morning. The easiest way to find out your earning with AdSense is, sign in to your blogger account, now you are on the Dashboard click on monetize link, then you’ll see the monetize tab,
You'll be able to see the total number of page and ad unit impressions, ad clicks, click through rate, effective CPM, and your total earnings with AdSense, so you can get an idea of how well the program is performing for you and how much you can expect to earn over time in the program. From your monetize tab, also you can switch back to your AdSense account, view your AdSense reports, customize ads and remove your ads.

You also can find out how much you’ve earned with AdSense from your earning report, at your AdSense account, directly logging to https://www.google.com/adsense?sourceid=asos&subid=ww-ww-et-HC_entry&medium=link and clicking the Reports tab. If you’ve added AdSense for search Box to your blog, you can view your total earnings and your earnings separately for AdSense for content and AdSense for search.

What is AdSense for search?

We're presented several Google AdSense options. You'll notice that the first choice is what we have already added to our Blogger blog is AdSense for Content. But today we're focused on AdSense for Search. In our prior posts, How do I optimize my AdSense ads? I and How do I optimize my AdSense ads? II all we discussed about AdSense for content. Today we are going to discuss about how to add AdSense for Search to our blogs. AdSense for Search is a great option for blogs. It gives readers the ability to search the Internet from our own blog, as well as our blog content.

To add the AdSense for search box to your blog follow these steps; Sign in to your blogger account, on your Dashboard click on the Layout link. In Page Elements tab on your blog: Click the "Add a Gadget" link that appears in the sidebar of your layout. You'll then see a popup window with all the different types of Gadgets you can add to your blog. Look for the one called "Search Box" and click on the blue "+" icon:
You can then configure the “Search Box”. Once you have satisfied, click the orange color "Save" button. Now you’ve added AdSense for search box to your blog. If you are not happy with the position, where you’ve placed it, you can move your “Search Box” around the layout and place in your desired place. Learn how to customize your blog layout?
AdSense for search lets you offer your users Google web search directly from your blog. By placing an AdSense for search box on your blog, you'll generate earnings from ad clicks made by users on the search results pages.
However, you will not receive revenue from user searches through your AdSense for search box, which you have placed on your blog. When users perform searches on your blog, but choose not to click on the ads on the search results pages, you will not receive any earnings though the use used the AdSense for search box on your blog.
We think you are a complete newbie to the Google AdSense program. For those AdSense has gathered all the essential information in the Newbie Central, the complete resource center for newly approved AdSense publishers. There you'll find everything you need to get started with AdSense, learn more about the program and advanced features, and maximize your AdSense experience.

Optimize my AdSense ads? II

Blogger gives you the opportunity to use three ad units. If you don’t use this opportunity, you are wasting your opportunity to maximize your income. First go to the Layout Page Elements tab of your blog: Click the "Add a Gadget" link that appears in the sidebar of your layout. You'll then see a popup window with all the different types of Gadgets you can add to your blog. Look for the one called "AdSense" and click on the blue "+" icon:
You can then format the ad to suit to your blog. Once you have satisfied, click the orange color "Save" button. You have now added another AdSense unit. If you are not happy with the position, where your new ad unit placed, you can customize the layout moving your ad unit around the layout to locate in your desired place.

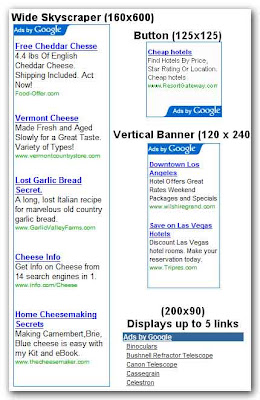
Blogger recommends you following ad units for the sidebar, choose among these

· Button (125x125)
· Skyscraper (120x600)
· Wide Skyscraper (160 x 600)
· Vertical Banner (120 x 240)
· Small Rectangle (180x150)
· Vertical text link (120x90), (160x90), (180x90), (200x90)

You’ll have to test them to see which one works best for your blog. Starts with the button, follow your stats for a week, then replace it with a vertical text link and then a skyscraper and compare the results. You should soon discover which deliver the best CTR on your site.
You’ll be able to view all the text ads, image ads, video ads and link units on Google AdSense Ad Formats

Play around with the different format options to optimize your AdSense ads. Get a feel for the different shapes and sizes that Blogger AdSense options have to offer.

Optimize my AdSense ads? I

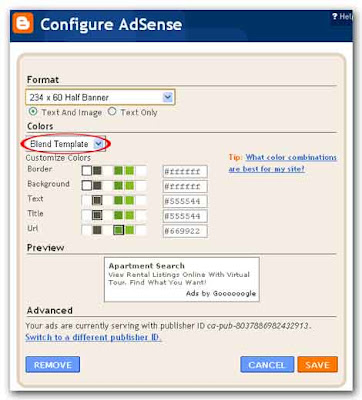
To get maximum revenue from your AdSense ads you should optimize them. The principle behind optimizing AdSenses ads is to make your ads look like part of your content, not like ads. Blogger assumes that’s how you want your AdSense ads to look. That’s why the default color scheme when you’re first asked to choose your ads is the “Blend Template.” This removes the borders from the ads, makes the background color the same as the background color of your blog’s template and matches the font color of the content and title of the ad to the content and title of your blog.

To format you’re AdSense ads you should login to your blogger account, on your dashboard click on the layout link.

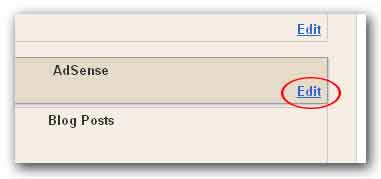
In page elements page click Edit on AdSense element.

Then the “Configure AdSense” page will be displayed where you can format your AdSense ads. Make changes you want to do, then click on the orange color save button.

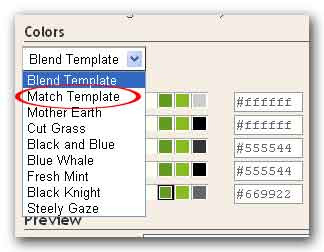
You’d better not to use any other color scheme than “Blend Template”. The match template is somewhat ugly and while choosing other schemes will make your blog look pretty, but they won’t do much for your income.
When you’re going to optimize your AdSense ads, it’s very important to put the right ads format in the right places. Research has shown that wider ads are more successful. You start by placing one ad at the top of the page you’re likely to get the best results there with one of the following, the top three formats are:

· Large rectangle (336x280)
· Medium rectangle (300x250)
· Wide skyscraper (160x600)

Additionally, the 468x15 horizontal ad link under the navigation bar is also good.
The horizontal text link will look like a menu bar of a conventional website. Sometime it will be good option for your page. The banner fills the space very neatly above the first blog entry. We’ll further discus how to optimize your AdSense ads in our next article, “How do I optimize my AdSense ads? II

Where do I place my AdSense ads?

Do you really want to get the maximum potential income from your AdSense ads; you must consider the best location for AdSense ads. If you’ve placed you AdSense ads where users’ attention don’t get, you’ll gain nothing or get poor income. The best location to place your AdSense ads varies from page to page, depending on the content. Consider these reasons.


· What is the user trying to achieve by visiting my site?
· What do they do when viewing my page?


Google has given us a diagram of a page layout to make easy this task. Google calls this the “Heat Map”.

This heat map is useful as a positioning guideline. The colors fade from dark orange (strongest performance) to light yellow (weakest performance). As you can see the best areas for ad placement is the viewing area that is first seen when a user visits your site. Typically this will include the header, navigation system, and your content. What you want to do is place the AdSense near rich content areas that readers are going to be drawn to. As mentioned above, in most cases this will be near the header, navigation, and content. Understanding these hot zones is crucial.

For example, on pages where users are typically focused on reading an article, placing your AdSense ads directly below the end of the editorial content perform very well. It's almost as if users finish reading and ask themselves, "What can I do next?" certainly targeted ads can answer that question for them.

AdSense terms and conditions

I do recommend that you do read the AdSense terms and conditions carefully. Generally Terms and Conditions are quite boring. Most people take one look at terms and conditions, assume that everything is okay and tick the check box. If that’s you (like most people) then this post is for you – it’s very important to understand the terms and conditions so we don’t get our AdSense accounts banned.

Invalid Clicks;
Do not click on your own AdSense ads. Any method that using robots or artificially generates clicks or impressions is strongly prohibited. You can test your ads without any risk of invalid click with AdSense Preview Tool. If you have got an idea to set up a blog and earn money from clicking on your own ads all day long. Forget about it, you are going to get your earnings cut off and terminated your account. Very often, people click their own ads simply because they are curious on what is behind the ads. That's why they click and open the ads. This is absolutely forbidden. Clicks must result from genuine user interest.
· Don’t encourage others to click on your AdSense ads. Don’t give any form of encourage to click ads.
· Don’t ask friends/ relatives to click your own AdSense ads.
· Don’t request users to click your ads using phrases like these or similar to these phrases “support us”, “click here”, “for more info.” and “click these links” etc.
· Don’t direct user’s attention towards ads using arrows or any other graphical methods.
You should not join those programs like paid-to-surf-, paid-to-click, or even traffic exchange programs. Google have very sophisticated detection system to detect these programs. Also, don't use some sort of deceptive tools in order to have automatic clicks on your ads. Google can detect them quite efficiently.


Site Content;
AdSense is not allowed on several non content pages. The content of your blog may comply with the Google’s content guidelines;
· Don’t include violent content, advocacy against any individual, group, or organization.
· Don’t include pornography, adult, or mature content.
· Don’t include gambling or casino-related content.
· Don’t include sales or promotion of prescription drugs.


Ad Placement;
Google AdSense offers several ad formats to place on your blog. Your can experiment with a variety of placements. We will be talking next, where should I place AdSense ads? To generate maximum income.
· Up to three ad units may be displayed on each page of your site.
· Up to three link units may also be placed on each page of your blog.
· Up to three referral units may be displayed on a page, in addition to the ad units, search boxes, and link units specified above.
· Google ads may not be placed on any non-content-based pages.
We have noted here a portion of Google AdSense terms and conditions. You’ve already understood Google AdSense terms and conditions when you are setting up your AdSense account. Anyway if you want to have a look at them again go to Google AdSense Program Policies

How to make money with AdSense?

As you learned from our prior post “How to monetize a blog?” Google AdSense is a free contextual advertising service. There are some differences between Google AdSense and other ad networks. Google AdSense matches ads to your blog site’s content and audience, and you’ll get paid for each click the user made on your AdSense ads. Blogging is the easiest way to make money with AdSene.

AdSense lets you customize the appearance of ads to match the look and feel of your blog site. You can also customize the style of your AdSense for search box and search results of you blog page. The AdSense servers determine what your posts are about and display the most relevant ads to your readers. How nice is that? So if you have a blog about car, there might be ads related to car subject next to your post.

Ads can be either display cost-per-click (CPC) or cost-per-thousand-impressions (CPM)( What are CPM ads?) ads; this means that advertisers pay either when users click on ads, or when the advertiser's ad is shown on your site.

To make money with Google AdSenes;
Sign in to your blogger account, then on your blogger dashboard, click on Monetize link.

Set up your AdSense account here. If you don’t already have an AdSense account, select “Create a new AdSense account” option, click next.

Here you can configure ads, where you want to display them, select your choice and click next.

Then you have to fill the AdSense account set up information form correctly, now you can see Google AdSense terms and conditions, read carefully and understand them, if you agree with them, tick on the check box and click the button. Now you’ve monetize your blog with Google AdSense. As Google states it will take up to 48 hours to be reviewed your new account before ads are displayed on your blogger account.

What is AdWords?
This is Google’s another most popular program. AdWords program enables you to create advertisements which will appear on relevant Google search results pages and their network of partner sites. Learn more about Google’s AdWords program.

The Google AdSense program differs in that it delivers Google AdWords ads to individuals' websites. Google then pays web publishers for the ads displayed on their site based on user clicks on ads or on ad impressions, depending on the type of ads. You can understand that these two programs go together, that is the relationship between these two programs.

Now all you know, how easy to make money with AdSense. Make legitimate income with Google AdSense. Any one can make money with AdSense using your blog. Adsense is free, you have nothing to loose but you are making money.

How to monetize a blog?

Every day, thousands of people look for online money making methods. Most new comers to the Internet get caught to scam sites and get lost their hard earn money. In my experience, I don’t trust quick money making schemes. I know that most people agree with me. Precisely Blogging can be a very lucrative way to earn money online. Most successful bloggers use blogging as their fulltime money making method. Creating a blog in a high traffic niche monetize it with ads, is the best way to make some excessive money.

Once your blog up and running with a quality posts, it's time to monetize your blog. A blog can be considered as an ultimate money making machine, it earns even when you are sleeping. There are plenty of ways to monetize your Blogger blog. All the following methods can use together to monetize your blog. Use multiple streams of income generating methods, don’t be limited to one method.

· Google AdSense program.
· WidgetBucks is also is a free ad service like Google AdSense.
· Text link ads
· Chitika
· Donations
· Affiliate programs


You also can monetize your blog by directly approaching to advertisers.

1. Google AdSense: The most popular search engine - Google has introduced a contextual advertising service called AdSense. (About AdSense ) Which allows virtually any website or blog owner to make money. AdSense is a program in which you get paid for targeting your readers to another websites product or service. Someone clicks on one of these ads they go to the advertiser's site. The advertiser is then charged for the click by Google and Google shares the money with you. Many People are making thousands a month with this. Learn How to make money with AdSense?

2. WidgetBucks: WidgetBucks launched in October 2007, is a vertical shopping ad network that helps publishers and bloggers optimize their earnings easily. WidgetBucks is one of the Internet's fastest growing ad networks. It is also free service like Google AdSense and compatible with all other ad systems. See how you can maximize your income with WidgetBucks?

3. Text link ads: Text Link Ads is the premier targeted traffic and link popularity ad firm. Generate targeted traffic to your website -Improve your natural search engine rankings Only advertisements from Text Link Ads can do both. Many Text Link Ads publishers earn thousands of dollars per month. Once your blog is approved, your blog will be added to their marketplace within 48 hours, at which time it will be ready for purchase. By simply installing the Text Link Ads script on your site one time, you are set up to earn a consistent revenue stream and truly monetize your blog. Text Link Ads are priced on a flat rate for a 30 day period, so your earnings will not be dependent on clicks or impressions like most of the other advertizing programs. Payments are sent out immediately on the first day of each month with no fees. You can use Text Link Ads to monetize your blog with other advertizing programs.

4. Chitika: Chitika is a full-service on-line advertising network serving over 2 billion monthly impressions across more than 30,000 websites. Chitika is 100% Compatible with Google AdSense. Chitika is an easy-to-use platform for earning daily ad revenue. Make sure your SEO'd site is cashing in on that search engine traffic with Chitika Premium, the world's premiere search targeted advertising solution. Use Chitika to increase your revenue with other advertizing programs. Chitika recently released an eBook to help bloggers. The eBook is “Deep Secrets of Successful Blogging learn from 30 experts”. You can get this for free clicking the following link.

Get free eBook Now!

5. Donations: another effective way to monetize your blog is paypal donation. When we are talking about monetizing a blog, methods like Google AdSense and WidgetBucks comes to mind. However, these free ad services are not the only ways to generate revenue. So even if your content is free like mine, give your visitors a means to voluntarily contribute if they wish.

PayPal is the leader in sending money and buying products online. This free service utilizes by people around the globe to purchase items from places like eBay and Amazon. But one of the great features that PayPal provides bloggers is the ability to create a donation button. This process is easier than ever.

6. Affiliate programs; another profitable way to earn money is to sell affiliate products. You simply direct traffic to their Web site and earn commissions when people buy products. They'll give you a link to track your sales. Amazon.com is great place to get HTML codes for various products to promote and earn good commission. Thousands of people are making a full time income just by only driving traffic from their site to merchant sites, never touching or shipping a product.

There are many more ways to monetize your blog, but above enlisted methods can generate substantial amount of money for beginners and let us leave rest for expert guys. But remember you can't do it overnight, patience and dedication you can make, good content pay back for itself and then some.

What is Following a blog?

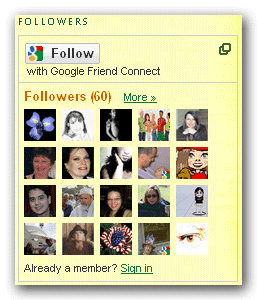
Do you have a favorite blog and want to let the author and readers know that you are a fan? Well now you can do that and more with the Blogger Following feature! You can even keep track of the blogs you follow via your Reading List on the Blogger dashboard. There are several ways to become a follower of your favorite blog. One of the easiest ways is to visit a blog that has added the 'Following' widget, ad then follow these steps:

Visit a blog that has added the Following widget and click on the "Follow" button under the "Followers" widget:
You'll then see a popup window with the options to either follow publicly or privately:

Select how you'd like to follow the blog, and then click the "Follow this blog" button. It is that simple, you are now a follower of the blog! If you elected to follow the blog publicly, your profile picture will be displayed on the blog with a link to your Blogger profile (Note: The widget may not show all followers of the blog. If this is the case all followers will be linked from the widget).

When you become a follower of a blog, the blog will also be added to your Reading List on your Blogger dashboard and this site will also show on your Friend Connect profile for all the sites you've joined using Friend Connect. Additionally, you can become a follower of any blog or URL (even if the blog doesn't have the Followers widget) by adding the blog to your Reading List on the dashboard.


How to remove yourself from following a blog

The easiest way to remove yourself from following a blog is to visit the blog, and click "Settings" under the Following widget on the blog.

You will then see a pop-up window with your profile settings. Click the "Stop following this site" link and you will be removed from following that blog. If the blog doesn't have a Followers widget, you can still stop following the blog. To do so, go to the "Blogs I'm Following" tab under your Reading List on your dashboard
Then click the blue "Manage" button. You will then see a list of all the blogs that you are following. To stop following a blog, click the "stop following" link next to the blog you want to stop following.
Lastly, following a blog will create a subscription to the blog in your Google Reader account.

How to customize my blog layout?

Changing blog template is a fun way to customize your blog layout. When creating a new blog, you're first asked to choose a default template; this is the basic design of your blog. You can choose from customize your blog's layout using our intuitive drag-and-drop interface. You can also add powerful gadgets such as slideshows, user polls, or even AdSense ads. Changing the fonts and colors on your blog is easy too. If you want more precise control over your blog's layout, you can also use the Edit HTML feature. To edit your blog's layout, follow these steps:
1. Click the Layout link from your dashboard below the blog you would like to customize.
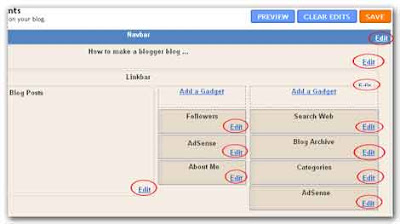
2. From the Page Elements sub-tab, click Edit to edit existing gadgets, or Add a Gadget to add new ones.

3. After you've clicked Add a Gadget, simply click the plus sign next to your desired gadget. You can choose from gadgets by category, or search for a specific gadget in the top right of the pop-up window.
4. You have the freedom to drag the page elements and drop them to arrange in a proper way. The mouse pointer changes when you point on the page elements then click on them and arrange as you like.
5. Once you've added the necessary information to your selected gadget, click SAVE button. Your layout changes will appear instantly.
6. When you are on your page elements tab, you can configure any of the page elements by clicking the “Edit” link on each elements. You can add and remove gadgets from your blogger layout when ever you want. Also Blogger gives you the freedom to format, configure and move around you page elements when ever you want.
Compared to a web site and other blogging platforms, Blogger has a lot of resources to add as gadgets to your blog. After adding a gadget you can customize them or if you want to remove them form you blog later you can do that. To remove a gadget simply click the Edit button of the relevant gadget, then click the Remove button from the pop up window. So, how easy to customize your blog layout?

How do I add new posts to my blog?

To add a new post to your blog, sign-in to your Blogger account at Blogger homepage, where you can enter your username (e-mail address) and password.
Once you've click on blue color SIGN IN button, you taken to your blogger dashboard. The dashboard will show you all your blogger blogs you currently have. From your dashboard you can enter to all the works you want to do, to any of your blogs you manage at blogger, post a new blog post, edit posts, change settings, adjust your layout and monetize. When you are going to add a new post to your blog, simply click on the blue color NEW POST button.
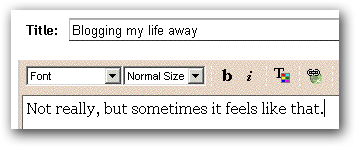
Next, you'll be displayed the post editor window (Writing and publishing a new post I). Start writing your post by giving the post a title (optional), and then enter the post itself:

What are backlinks?

· Backlinks display other webpages that link to your posts.
· To enable backlinks on your blog go to your SettingsComments tab and select Show

Backlinks enable you to keep track of other pages on the web that link to your posts. What it all works out to is a way of expanding the comment feature such that related discussions on other sites can be included along with the regular comments on a post. The backlinks setting can be found under the Settings Comments tab, and consists of a single, simple option to turn it on or off:

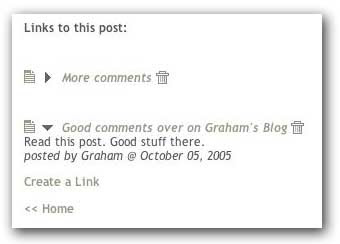
Once everything is set up, you'll see a new link marked "Links to this post" next to the comment link for each post:
If you click that link you'll be taken to the post page, where the backlinks are all listed beneath the comments. Clicking the triangles next to each link will display a snippet of text from the page linking to you, as well as some author and date information.
If you want to turn off backlinks for individual posts, you can do so. The process is the same as that for turning off comments. Just edit the post in question and change the options that appear below the posting form:
Login to blogger to at Blogger home page to do all the work you want to your blog. Add new posts to your blog regularly. Blogger likes if you post frequently.

How to add images from photobucket?

When you wanted to host your images and videos, the ideal place for that task is photobucket. Sometimes your uploaded images to your blog posts won’t display with its original size. In this case we can assist a third party service to fix this problem. Photobucket is ideal for this; it is a free image and video hosting service. Photobucket is the premier site on the Internet for uploading, sharing, linking and finding photos, videos and graphics. Your free Photobucket account can store thousands of photos and hours of video.

Create a free account with photobucket
Go to the photobucket.com and click on the green color Join Now button.

In the next step, give a user name and a password and then click Next step button.
After creating your photobucket account you’ll be able to upload your images and videos you want to. Login to your photobucket account and click on the Choose files button. Select the files you want to upload to your photobuket account then click open.
How to add images to your blog?

Point the mouse to the image you want to add. Form the pop-up box click on the HTML Code box. Copy the link and past it in the exact place in your blog post editor window. Before you past the link make sure to select the Edit HTML tab on Blogger post editor window.

Add images and videos to your site form photobucket for free. Make your site more informative adding images and videos. Photobucket gives you more flexible features.

How do I add images and videos to my blog posts?

Adding images and videos to your blog posts is one of the simplest and most effective things you can do to grab and hold the attention of your readers, otherwise when you are writing your blog posts especially in tutorial mode, you want to add images and videos to give detailed explanations to the readers.

Adding an image to your blog post
Many bloggers do not use images; sometimes they don’t know the importance of using images with their blog post. Images enhance your blog posts in several ways:
· Images make your blog post look better.
· Images make your blog post look more professional improving the look of it.
· Images make your blog differentiate your blog from the rest.
· Images make your blog articles memorable to your visitors.

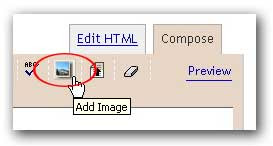
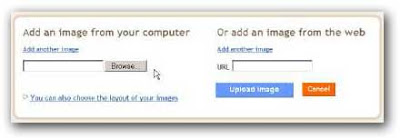
You can add images to your blog posts from your computer or from the Web. Click the image icon in the post editor toolbar.

Browse for an image file on your computer, or enter the URL of an image on the Web.
Once you've selected your image, you can then choose a layout to determine how your image will appear in your post:

  • The 'Left', 'Center', and 'Right' options allow you to customize the way your blog text will flow around your image.

  • The 'Image size' options will determine how large the image will appear within your post.
Click UPLOAD IMAGES button to add your image, and then click DONE when the notification window appears telling you that 'Your image has been added.' Blogger will then return you to the post editor, where you'll see your image ready to be published to your blog.

You can also publish images to your blog using your mobile device, Google's free photo software Picasa, or a third-party service like flickr. Learn more

Sometimes your uploaded images to your blog posts won’t display with its original size. In this case we can assist a third party service to fix this problem. Photobucket.com is ideal for this; it is a free image hosting service. How to add images from photobucket?

Adding a video to your blog post
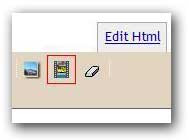
To add a video to your blog post, click the film strip icon in the post editor toolbar.

Click Browse to select the video file from your computer that you'd like to upload. Note that Blogger accepts AVI, MPEG, QuickTime, Real and Windows Media files and that your video must be less than 100MB in size.

Before uploading your video, add a title in the 'Video Title' box and agree to the Terms and Conditions (you'll only have to do this the first time that you upload a video with Blogger). Then click UPLOAD VIDEO.

While your video uploads, you'll see a placeholder in the post editor showing where your video will appear. You'll also see a status message below the post editor letting you know that your upload is in progress. Depending on the size of your video, this usually takes about five minutes. When it is complete, your video will appear in the post editor. How do I add a video to my blog?

Writing and publishing a new blog post II

When publishing your new blog post, sometimes an error message will be displayed telling that you have a HTML error.

If you haven’t modified “Edit Html” section manually or you can’t think any possible reason for this error message, simply click on the check box “Stop showing HTML errors for the body of this post”. Then you can save and publish the post.


When you create a new post, Blogger will start automatically saving it for you once a minute without interrupting your typing. When it does , you'll see a little note next to the "Save" button, like this:

If you want to make sure the saved copy is completely up to date, you can click the "Save" button yourself. You'll remain on the post editor and can continue typing, since the saving happens in the background. If you're done working on the post for now, you can either click orange color "Publish Post" button to convert the draft into a post, or click "Return to list of posts" if you want to leave it as a draft and go back to the Edit Posts page.


Autosave does not occur when you are editing posts that have previously been published to your blog. This keeps your readers from seeing your edits until you're done with them. When editing a published post, you can click "Publish Post" to republish the changes to your blog, or click "Save as Draft" to unpublish the post and turn it into a draft.

Labels are handy if you blog about a lot of different subjects, since readers can then choose to view all of your posts on, say, dancing at once. Or politics, or knitting, or whatever you happen to be writing about. If you have a team blog, you could also give each member their own label, so you could easily read all the posts by any one of them. Feel free to come up with other creative new uses as well!


When you're writing a post, you'll have a space at the bottom of the post editor marked "Labels for this post." Enter whatever labels you like, separating them with commas. You can also click the "show all" link to display a list of labels you've used previously. Then just click on the labels to add them.

When you publish your post, the labels will be listed with it. Clicking any of the labels will take you to a page containing only posts with that label.
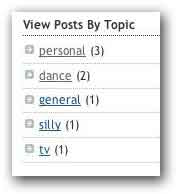
You can easily change the formatting used here by editing your blog's layout. You can also add a list of all your labels in the sidebar of your blog, sorted alphabetically or by frequency of use.
This is convenient way to readers; they can easily select the category which they find about by clicking the desired label. When you write and publish several blog posts, you’ll familiar with these options.

Writing and publishing a new blog post I

Now you’ve made your blogger blog. After you’ve been created your blog, you’ll be taken to a page where you can start writing and publishing your new blog post. There you’ll also be able to change all the settings and format of your blog, control the comments and change your current template if you want.

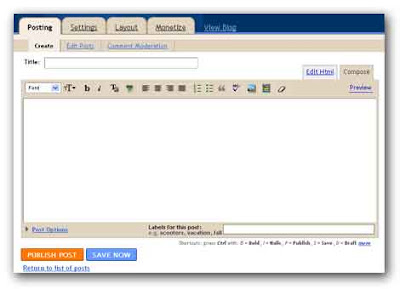
After setting up your blog, you are taken to the Create New Post page. Start by giving your post a title (optional), and then enter the post itself:

Here when you are writing the post in the writing space make sure the compose tab is active.
Blogger's post editor has three modes:


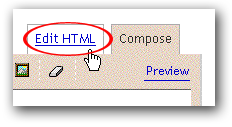
  • Compose: a wysiwyg mode where you manipulate text with formatting buttons

  • Edit HTML: a raw mode where you edit the html manually

  • Preview: renders a full-body preview of the post, including its Title, links and images

To switch among these modes, simply click on the appropriate link:

If you'd rather not use the wysiwyg editor, you can disable it in the Settings Basic tab in Blogger. The formatting buttons are only available in certain browsers. Keyboard shortcuts are also available; they can greatly speed up the posting process and we encourage you to use them.

Features, from left-to-right:


  • Font

  • Font size

  • Bold

  • Italic

  • Font color

  • Link

  • Left-justify

  • Center

  • Right-justify

  • Full-justify

  • Ordered (numbered) list

  • Unordered (bullet) list

  • Block quote

  • Spell check

  • Upload imageRemove formatting from selection

Blogger developing an advanced, standards-compliant web-based rich text editor give you a convenient way to writing, publishing and edit your blog post.


When you're done, click the Preview link to make sure it's ready to go:

Once you're satisfied with your post, click the orange color PUBLISH POST button. This will publish your new post.


You’ll be displayed the message Your blog post published successfully!, now click “view blog” link to see your blog.
In our next post “writing and publishing a new blog post II” you’ll find further more explanation to write you a blog post.