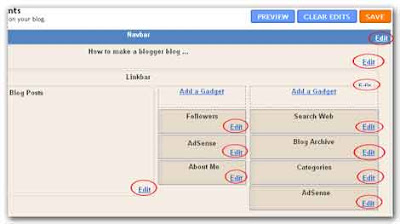
1. Click the Layout link from your dashboard below the blog you would like to customize.
2. From the Page Elements sub-tab, click Edit to edit existing gadgets, or Add a Gadget to add new ones.

3. After you've clicked Add a Gadget, simply click the plus sign next to your desired gadget. You can choose from gadgets by category, or search for a specific gadget in the top right of the pop-up window.
 4. You have the freedom to drag the page elements and drop them to arrange in a proper way. The mouse pointer changes when you point on the page elements then click on them and arrange as you like.
 5. Once you've added the necessary information to your selected gadget, click SAVE button. Your layout changes will appear instantly.
 6. When you are on your page elements tab, you can configure any of the page elements by clicking the “Edit” link on each elements. You can add and remove gadgets from your blogger layout when ever you want. Also Blogger gives you the freedom to format, configure and move around you page elements when ever you want.
 Compared to a web site and other blogging platforms, Blogger has a lot of resources to add as gadgets to your blog. After adding a gadget you can customize them or if you want to remove them form you blog later you can do that. To remove a gadget simply click the Edit button of the relevant gadget, then click the Remove button from the pop up window. So, how easy to customize your blog layout?